
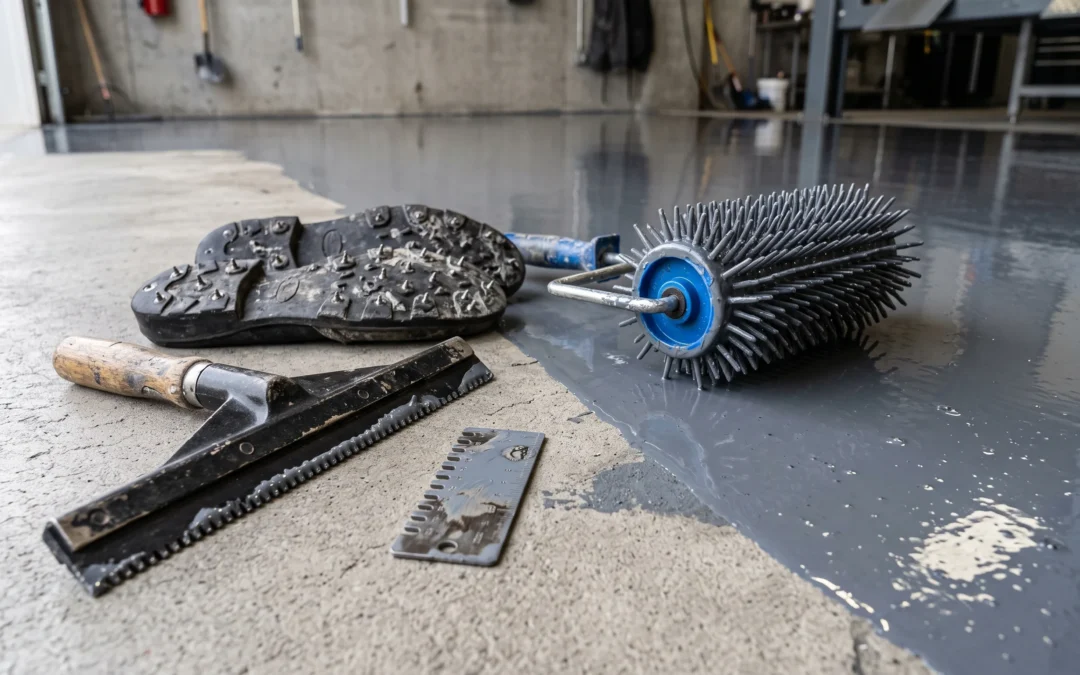
What separates a professional epoxy application from a competent DIY job isn’t a secret product — it’s about seven working techniques that never make it into the instructions on a kit box: checking the dew point before mixing, measuring film thickness instead of guessing it, back-rolling every pass, walking the wet floor in spiked shoes, broadcasting flake to full rejection, and hitting recoat windows to the hour. None of them are hard to understand. All of them are the habits our own installation crews are trained on, and this post explains each one plainly enough to use — or at least to recognize when you’re watching a contractor who has them.
Pro Habit 1: Qualify the Conditions, Not Just the Floor
Amateurs check the weather; professionals check the dew point. If the slab’s surface temperature is within about 5°F of the dew point, moisture is condensing invisibly on the concrete, and resin applied over that film will haze, fisheye, or bond poorly. A crew carries an infrared thermometer and a hygrometer and does this math before opening a single bucket — along with confirming the slab sits in the product’s temperature range and will stay there through the cure, not just at the start. Ten minutes of instrument readings prevents the kind of whole-floor haze no technique can fix afterward.
Pro Habit 2: Mix Like a Chemist, Pour Like a Painter
Professional mixing discipline has three parts DIYers routinely miss. Ratio by measurement, never by eye — off-ratio resin cures soft permanently. Low-speed mechanical mixing with the paddle kept buried, because whipping air into resin means bubbles in the finish. And the one that surprises people: don’t let the mixed bucket sit. Resin curing in a mass generates its own heat, which accelerates the cure, which generates more heat — a full bucket left standing can kick in minutes. Crews pour the batch out onto the floor in ribbons immediately, where the thin film sheds heat and the working time roughly doubles. The clock runs slower on the floor than in the bucket.
Pro Habit 3: Measure the Film, Don’t Eyeball It
Coverage math on a label is a guess; a wet-film thickness gauge is a fact. This little notched card, pressed into fresh resin, reads exactly how many mils are on the floor — and pros check constantly, because concrete porosity varies across a single slab and a roller naturally thins out as the section goes on. Thickness is where durability physically lives: a floor that’s 60% of spec is a floor with 60% of its life. This is also the honest explanation for why professional floors outlast kits — a 100% solids basecoat laid to a measured thickness simply leaves several times more cured material on the concrete than a thin water-based product can.
Pro Habit 4: Back-Roll Everything
Watch a crew and you’ll see resin go down twice: spread first with a squeegee or roller to distribute the volume, then immediately re-rolled — back-rolled — in perpendicular passes with light pressure. Back-rolling erases lap lines, evens out squeegee tracks, pops surface bubbles, and re-wets the leading edge so sections melt into each other instead of photographing as stripes under the topcoat’s gloss. It costs one extra pass and it is the single most visible difference between a professional finish and a first attempt.
Pro Habit 5: Walk on the Wet Floor — in Spiked Shoes
DIY instructions treat wet resin as lava, which forces you to coat yourself into a corner and accept whatever you can reach. Crews strap on spiked soles and walk straight across the wet film — the spikes leave pinpricks that flow closed in seconds. That freedom is what makes uniform broadcasting, mid-floor touch-ups, and gauge readings possible. It matters most on decorative work: a metallic epoxy floor is essentially sculpted from on top of the wet material, and it can’t be done from the edges.
Pro Habit 6: Broadcast Flake to Full Rejection
The kit method is to sprinkle flakes over the wet coat until the box is empty. The professional method is a full-rejection flake broadcast: flake is thrown into the air to rain down evenly, again and again, until the wet resin is completely saturated and physically rejects any more. The floor looks buried in flake — because it is. After cure, everything unbonded is scraped and vacuumed off, leaving a dense, uniform, completely opaque surface with no thin patches and no basecoat showing through. It consumes several times the flake of a light broadcast, which is why kits don’t do it, and it’s the defining texture of a real flake floor.
Pro Habit 7: Respect the Recoat Window
Every layer bonds chemically to the one below it — but only inside a time window. Recoat too soon and you drag the previous coat; too late and it has cured slick, so the new layer bonds mechanically at best and peels at worst. Pros schedule the entire job around these windows, which is how a one-day garage floor coating install actually works: fast-cure chemistry with tight, planned windows, each layer landing exactly when the last one is ready for it. Miss a window on a DIY job and the correct recovery is to abrade the surface before continuing — annoying, but far cheaper than a delaminating topcoat. The final layer deserves the same discipline: a UV-stable polyaspartic topcoat, applied inside the window, over a scraped and vacuumed broadcast.
What This Adds Up To
Every habit above is learnable, and a meticulous DIYer can adopt most of them — spiked soles and wet-film gauges are cheap. Where the gap can’t be closed with technique is upstream: crews work over a bonding profile cut by diamond grinding, not acid etching, and they apply materials engineered as a system. We manufacture ours, which means the basecoat, broadcast, and topcoat are formulated for each other’s recoat windows rather than assembled from whatever three brands the store carried. Technique is free to copy. The system behind it is the part you hire.
Frequently Asked Questions
What is a full-rejection flake broadcast?
Broadcasting flake into wet resin until the surface is fully saturated and cannot hold any more — then scraping and vacuuming off the excess after cure. It produces a dense, uniform, opaque flake surface with no thin spots, and it uses several times the flake that a decorative sprinkle does.
What is a recoat window in epoxy flooring?
The time span during which a new coat will still chemically bond to the previous one — typically from the moment the prior coat is tack-free until it has fully cured. Coating outside the window means weak adhesion; if it’s missed, the surface should be abraded before the next layer.
Why do professionals back-roll epoxy?
Back-rolling — re-rolling freshly spread resin in light perpendicular passes — levels lap lines and squeegee tracks, releases trapped air, and blends sections into one continuous film. It’s the difference between a mirror finish and one with visible stripes under the gloss.
What tools do pro epoxy installers use that DIY kits don’t include?
Diamond grinders for surface prep, infrared thermometers and hygrometers for dew-point checks, wet-film thickness gauges, spiked shoes for walking wet resin, notched squeegees for metering thickness, and enough flake to broadcast to rejection. None are exotic — but no kit box contains them.
Top Epoxy Flooring’s crews apply these techniques daily with VOC-free systems the company manufactures itself, across Southern California — limited lifetime warranty on residential installs. Call (818) 945-0915 for a free estimate.
Recent Comments