
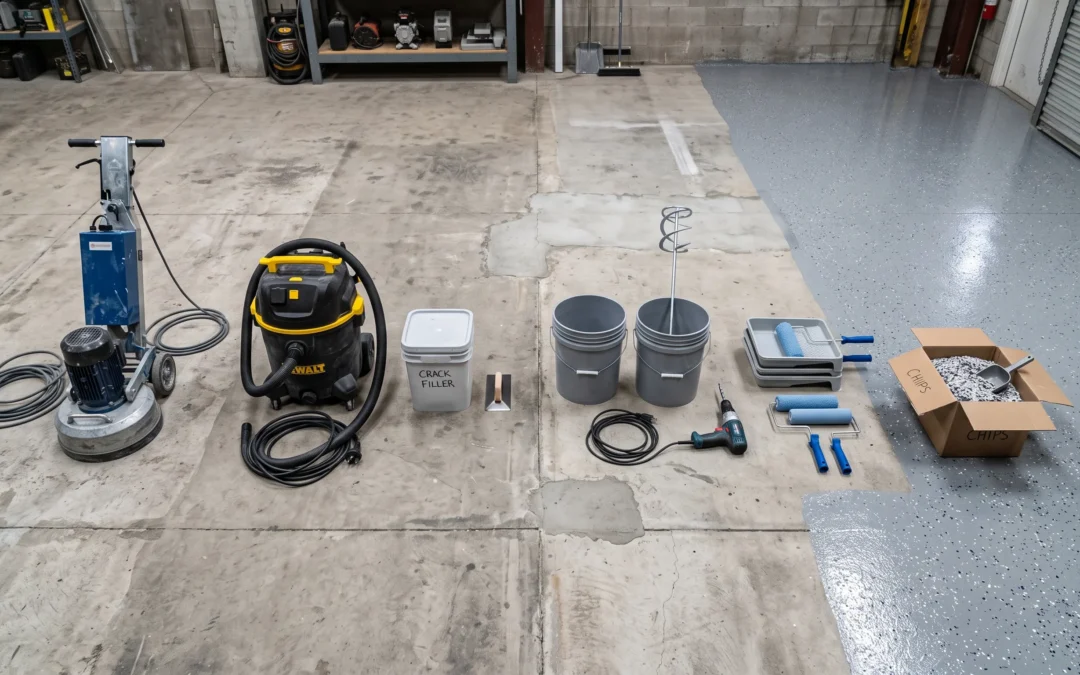
Epoxy flooring is done in ten steps, in a fixed order: test the slab, clear and degrease, grind, vacuum, repair, cut in and coat the verticals, roll the basecoat, broadcast the media, scrape and vacuum again, and apply the clear topcoat. The order is not negotiable — every step exists to make the next one possible, and every shortcut surfaces later as a failure with a name (peeling, blistering, hot-tire pickup). This is the exact sequence our own crews run, written out plainly. It’s the same whether the system is flake or solid color epoxy; only the middle steps change character.
The 10 Steps in Order
Step 1: Test the slab
Before anything else, answer two questions. Is moisture moving up through the concrete? Tape plastic sheeting down for 24 hours and look for condensation. Is there a sealer on the surface? Pour water on it — if it beads instead of darkening the concrete, a sealer is present and the grinding step has extra work to do. Ten minutes of testing here prevents the two most expensive failures in this trade.
Step 2: Clear and degrease
Empty the space completely, then attack oil and grease spots with a degreaser and a stiff brush until rinse water sheets over them instead of beading. Contamination that stays in the slab becomes a bond-breaker under the coating.
Step 3: Grind the concrete
Diamond grinding is the step that separates floors that last from floors that peel. The grinder cuts away the weak, smooth surface layer and leaves a bonding profile — a fine, uniform texture the resin physically keys into. Acid etching is the shortcut kits offer; it is not equivalent, and it’s the number-one root cause we find when we’re called to fix a failed floor. Our concrete grinding page covers the machines and why this step is non-negotiable.
Step 4: Vacuum — twice
Grinding produces fine dust, and dust is a release agent. Vacuum the whole slab, let the air settle, and vacuum again. Wiping a black glove across the floor should come up clean.
Step 5: Repair cracks and damage
Fill cracks, spalls, and popouts with a rigid repair mortar and grind the patches flush once set. A coating bridges nothing; it faithfully reproduces every defect you leave behind. Larger structural problems belong to epoxy floor repair territory before a full coating is worth doing.
Step 6: Coat the verticals
Stem walls, step faces, and curbs get coated first, by hand, before the floor — working wet resin up a vertical edge after the field is coated means kneeling in your own floor. This small-brush work is slow and it is where rushed jobs look rushed forever.
Step 7: Roll the basecoat
Mix the two components at the exact stated ratio, blend thoroughly with a paddle, and roll the floor in overlapping sections, always keeping a wet edge, always working toward the exit. On slabs that failed the Step 1 moisture test, this layer must be a moisture-vapor-barrier epoxy basecoat — an ordinary basecoat over a damp slab is a countdown, not a floor.
Step 8: Broadcast the media
While each section of basecoat is still wet, broadcast the flakes or quartz into it. Done professionally this is a full-rejection flake broadcast — the resin is loaded with flake until it cannot accept another one, which is what produces a dense, even, fully hidden surface. For a solid color system, this step is instead a second pigmented coat.
Step 9: Scrape and vacuum
After the broadcast coat cures, scrape the entire surface with a floor scraper to shear off loose and upright flakes, then vacuum all of it up. This locks in the final texture and leaves a surface the topcoat can wet out evenly.
Step 10: Apply the topcoat
The clear coat is the floor’s armor and its finish. A UV-stable polyaspartic topcoat resists abrasion, chemicals, and sunlight without ambering — it’s what we manufacture our systems around, and it’s the layer that decides how the floor looks in year ten.
How Long Does Each Step Take?
- Testing, clearing, degreasing: a few hours, plus the 24-hour plastic-sheet test running overnight
- Grinding, vacuuming, repairs: half a day to a full day depending on slab condition
- Basecoat and broadcast: two to four hours of coating work, then overnight cure for standard epoxy
- Scrape, vacuum, topcoat: two to three hours, then cure
With professional fast-cure chemistry, the whole sequence compresses dramatically: a flake floor takes 1 day, quartz 1 to 2, solid color 2 to 3, and a hand-worked metallic 3 to 4. DIY epoxies stretch the same steps across a long weekend plus several days of cure.
Where the Steps Go Wrong
Almost every failed floor we’re called to fix traces back to a numbered step above being skipped or faked: no moisture test (blisters), etching instead of grinding (sheet peeling), dust left behind (delamination in patches), mixing by eye (soft, sticky zones), no scrape before topcoat (sandpaper texture), no UV-stable topcoat (yellowing). The application steps are genuinely easy; the discipline steps are the product. That discipline — plus manufacturing the material ourselves instead of buying whatever’s on the shelf — is why our residential installs carry a limited lifetime warranty.
Frequently Asked Questions
How many coats does epoxy flooring need?
Three layers minimum for a real system: a bonded basecoat, a broadcast or second color coat, and a clear topcoat. One-coat “epoxy paint” products compress all three jobs into one thin film, which is why they wear through and peel so quickly.
Can I skip the primer or basecoat and just apply the top layers?
No. The basecoat is the only layer actually bonded into the concrete — everything above it is riding on that bond. Decorative and clear coats applied straight to bare concrete sit on the surface instead of in it and release under stress.
What happens if the steps are done out of order?
The floor fails at whichever boundary was rushed. Repairs after grinding stay flush; repairs before grinding get torn open. Flakes into tacky resin bounce off instead of embedding. Topcoat over an unscraped broadcast feels like gravel. The order is the recipe.
Do professionals follow the same steps as DIY kits?
The skeleton is the same; the execution isn’t. Professionals grind instead of etch, use 100% solids and moisture-rated basecoats instead of water-thin paint, broadcast flake to full rejection instead of a sprinkle, and finish with polyaspartic instead of more epoxy. Same numbered list — different floor.
Top Epoxy Flooring runs this exact 10-step process with VOC-free systems it manufactures itself, backed by a limited lifetime residential warranty. Call (818) 945-0915 for a free estimate.
Recent Comments