
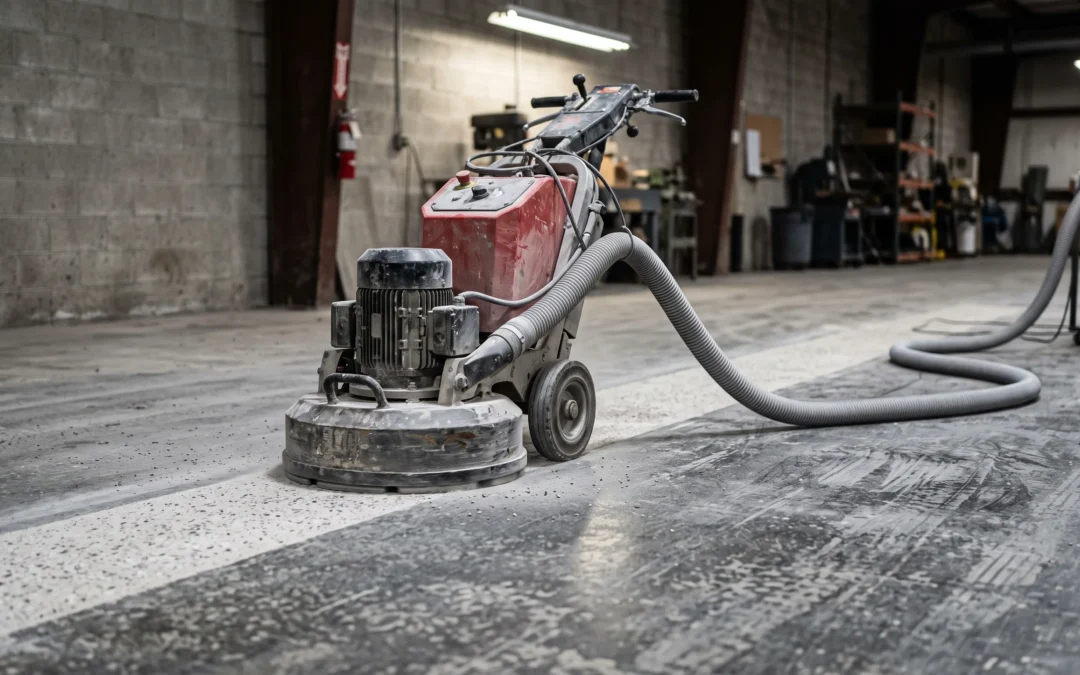
There is one method that reliably removes epoxy flooring: mechanical removal with a diamond grinder. Chemical strippers and heat guns exist, and this article covers them honestly, but they’re spot tools — slow, messy and incomplete over any real floor area. Grinding takes the coating off and, in the same pass, leaves the concrete profiled and ready for whatever comes next. Just as important is the question people skip on the way to the angle grinder rental counter: does this floor actually need to come off? A sound coating that’s merely ugly or worn doesn’t need removal — it needs a recoat, which costs a fraction of the labor. We remove and replace failed coatings across Southern California weekly, and we install the systems that go down afterward, so here is the full picture from a company that works both ends of the job.
First: Are You Sure It Needs to Come Off?
Removal is the most labor-intensive path in resinous flooring, so verify it’s the right one. The rule is about bond, not beauty:
- Keep and recoat if the existing coating is well bonded — no hollow sounds when tapped, no lifting edges, no blisters — but looks tired, scratched or dated. A bonded coating is a usable foundation: abrade it, and a new color coat and topcoat go straight over. Faster, cleaner, and it preserves the build thickness already on the slab.
- Remove if the coating is failing: peeling zones, blisters, widespread hollow spots, or a coating applied over unprepared concrete that never truly attached. Recoating over a failing bond laminates new money onto old failure — the new layers peel with the old ones. Our breakdown of how to fix peeling epoxy flooring shows how to read those failure signs.
- Remove selectively when failure is zonal — hot-tire areas peeled but the rest is solid. Grinding just the failed zones and feathering the edges saves most of the labor while fixing the actual problem.
One more removal trigger worth naming: changing systems. Going from a thin painted coating to a thick decorative system, or prepping for a grind and seal or polished finish, means the old material comes off regardless of its bond.
Method 1: Diamond Grinding — the Real Answer
A floor grinder running diamond tooling shaves the cured epoxy off the slab in controlled passes. It’s the professional method for four reasons:
- It’s complete. Aggressive diamonds cut through topcoat, broadcast, basecoat and primer down to bare concrete — including the material bonded so well that no chemical or heat approach would touch it.
- It’s contained. With a shrouded machine and HEPA dust extraction, removal produces manageable dust instead of a lake of solvent sludge.
- It solves the next problem too. The finish passes leave a bonding profile — the textured, open surface a new coating needs. Removal and surface preparation collapse into one operation, which is why this is the same equipment behind our concrete grinding service.
- It scales. A two-car garage is a day’s work with professional machines. Edges and corners fall to a shrouded hand grinder with a diamond cup wheel.
The realistic caveats: this is physical, loud, equipment-heavy work. Rental machines are lighter and slower than professional gear, tooling choice matters (soft-bond diamonds for coatings; the wrong segments glaze over and just heat the epoxy), and an uneven touch leaves gouges and swirls that print through the next floor. For thick industrial builds, pros sometimes lead with a shot blaster or scarifier to hog off material, then finish with the grinder — same principle, bigger appetite.
Method 2: Chemical Strippers — the Spot Tool
Solvent-based strippers soften cured epoxy enough to scrape. Where they make sense: a small patch, a splash of epoxy that landed where it shouldn’t have, edges around fixed equipment. Where they disappoint: entire floors. Cured floor epoxy is built to resist chemicals — that’s its job — so strippers need long dwell times, multiple applications and serious ventilation, and they leave a scraped mess plus a residue that must be completely neutralized and removed before anything new can bond. After all that, the concrete still isn’t profiled for recoating; the grinder shows up anyway. Use chemicals for spots, not squares of footage.
Method 3: Heat — the Last Resort
A heat gun softens epoxy for scraping a few square inches at a time. It works for lifting a small repair gone wrong or coating on a step face. As a floor-scale method it’s impractical — hours per square yard — and overheating scorches the concrete surface and creates fumes. File under “technically possible.”
What a Professional Removal Actually Looks Like
For anyone comparing quotes or planning a weekend, here’s the honest sequence on a failed garage coating:
- Loose and peeling material comes up first with scrapers — the easy 20%.
- The grinder makes aggressive passes with coating-removal tooling, extraction running, until bare concrete shows everywhere. Bonded areas fight back; this is the slow middle of the job.
- Edge machines take the perimeter and corners the big machine can’t reach.
- Now the slab tells its story — the cracks, spalls and moisture staining the old coating hid get repaired, and any moisture question gets tested rather than assumed.
- Finish grinding passes establish a uniform bonding profile, then a full vacuum.
Step 4 is the one DIY plans never include and the strongest argument for professional removal: the reason the old floor failed is written on the bare slab, and the new floor only outlives the old one if that reason gets fixed — moisture with a moisture-vapor-barrier epoxy basecoat, damage with proper repair, contamination with complete grinding. Removal without diagnosis is how the same failure gets installed twice. And badly spalled or gouged slabs sometimes need concrete resurfacing before they’re coatable at all.
After Removal: Don’t Stop at Bare Concrete
Freshly ground concrete is clean, open and vulnerable — it stains and dusts, and it drinks in every oil drip. If the plan is a new floor, coat within a reasonable window while the profile is fresh. A rebuilt garage floor coating over a properly stripped and diagnosed slab is the best-case installation: full preparation, known history, and — with a system built from a vapor-blocking basecoat through a UV-stable polyaspartic topcoat — a floor engineered not to repeat the removal.
Frequently Asked Questions
What is the easiest way to remove epoxy flooring?
There is no easy way — but the effective way is diamond grinding with dust extraction, which cuts through even well-bonded coating and leaves the concrete profiled for recoating in the same operation. Chemical strippers and heat guns only make sense for small spots; over a full floor they’re slower and messier than the grinder they’re trying to avoid.
Will chemical epoxy strippers work on a garage floor?
On patches, yes; on the whole garage, poorly. Cured floor epoxy is formulated to resist chemicals, so strippers need long dwell times and repeat applications, produce fume-heavy sludge, and leave residue that must be fully removed before recoating. Even then the slab still needs grinding to create a bonding profile — so grinding usually should have been the plan from the start.
Do I have to remove old epoxy before applying new epoxy?
Only if the old coating is failing. A well-bonded coating — no hollow sounds, lifting or blisters — can be abraded and recoated directly, saving enormous labor. A peeling or blistered coating must come off at least in the failed zones, because new epoxy bonded to old failure peels right along with it.
How long does it take to remove epoxy from a garage floor?
With professional grinding equipment, a typical two-car garage is roughly a day, including edges and cleanup — longer if the coating is a thick multi-layer system or the slab needs repairs once it’s exposed. With rental-grade machines, budget a full weekend and expect the bonded areas to fight for every square foot.
Top Epoxy Flooring removes failed coatings and installs its own manufactured, VOC-free systems in their place — serving all of Southern California, with residential floors under a limited lifetime warranty. Call (818) 945-0915 for a free on-site estimate.
Recent Comments