
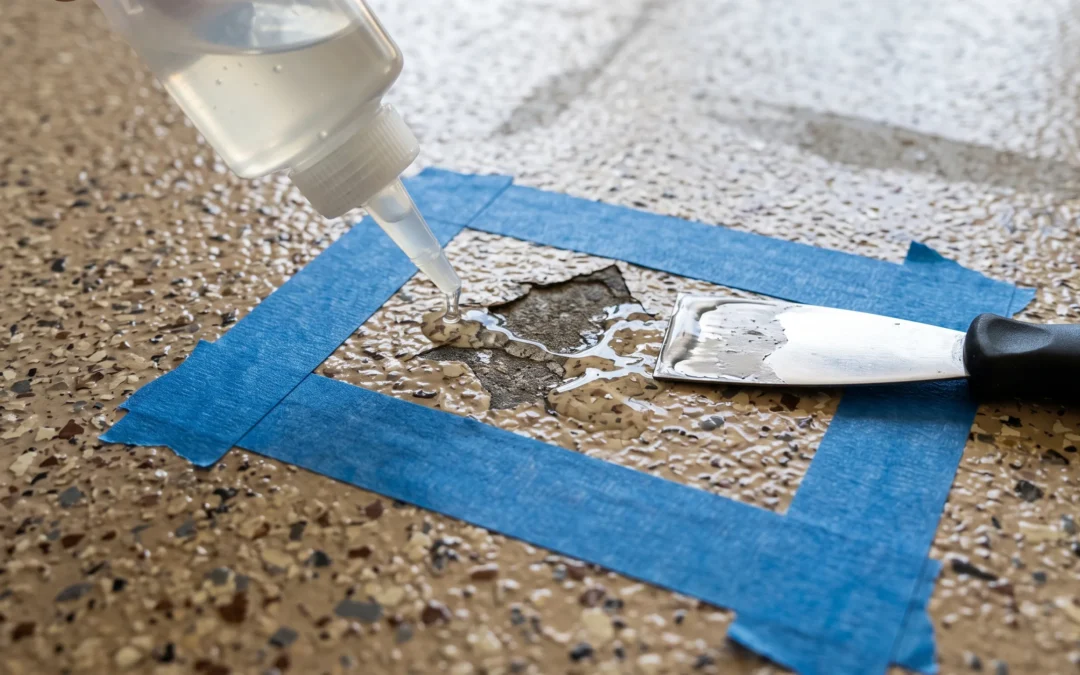
Repairing garage floor epoxy starts with a diagnosis, because the fix depends entirely on what failed: a chip gets cleaned, filled and blended in an afternoon; a crack that came up from the slab gets routed and welded before it’s coated; and a coating that’s peeling or blistering can’t be patched at all — the damaged zone has to come off and be rebuilt from the concrete up. Match the repair to the damage and a coated garage floor is one of the most fixable surfaces in a house. Mismatch them and you’ll repeat the repair every year. We handle epoxy floor repair across Southern California on systems of every brand and age — including plenty we didn’t install — so here’s the decision tree we run on every damaged floor, and which branches a capable homeowner can handle alone.
Start Here: What Kind of Damage Are You Looking At?
Walk out to the floor and answer three questions:
- Is the coating still attached everywhere? Press and tap around the damage. Solid, bonded coating with a divot in it is impact damage — the easy branch. Coating that flexes, sounds hollow, or lifts at an edge is a bond failure — the serious branch.
- Did the damage come from above or below? A dropped tool, a dragged jack, a dropped hitch — from above, and localized. A crack that mirrors a crack in the slab, a blister pushed up with nothing dropped on it — from below, and the slab or moisture is involved.
- How much of the floor is affected? A few isolated spots are repairs. Damage across whole zones — widespread peeling, dozens of blisters, alligatored texture — is a failing coating, and the honest conversation shifts from repair to recoat or rebuild.
Those three answers route you into one of the four branches below.
Branch 1: Chips and Small Gouges (From Above, Still Bonded)
The most common garage injury — a bare crater where something heavy landed, often at the door threshold or under the workbench. The coating around it is intact and well bonded. This is a legitimate DIY repair:
- Open and clean the wound. Scrape any half-attached fragments off the edges of the chip, then sand inside the crater and about an inch beyond it to dull the surrounding gloss — new resin needs texture to grip, even in a repair the size of a coin.
- Degrease and dry. Automotive floors are oily floors. Solvent-wipe the area and let it flash off completely.
- Fill with a compatible repair resin. A two-part epoxy patch or repair kit, mixed exactly per its ratio, worked into the crater with a putty knife slightly proud of the surface.
- Blend the finish. On a flake floor, sprinkle matching flakes into the wet fill so the repair disappears into the pattern; on solid color, level it as flat as patience allows.
- Recoat the spot. After cure, a small clear coat over the repair evens the gloss. Without it the patch reads as a flat spot at certain angles.
Expectation-setting from the manufacturer’s side of the counter: a spot repair aims for “unnoticeable from standing height,” not “invisible.” Color-matching aged, UV-exposed coating with new resin is genuinely difficult — one reason full-rejection flake floors are so forgiving is that their pattern absorbs repairs the way solid gloss never can.
Branch 2: Cracks That Telegraph From the Slab (From Below, Structural)
A line through the coating that follows a crack in the concrete underneath is not a coating problem — it’s a slab movement problem wearing a coating costume. Filling just the surface line guarantees it returns. The durable sequence:
- Rout the crack open with a crack-chasing wheel, through the coating and into the concrete, creating a clean groove.
- Vacuum it out and fill with a rigid epoxy crack weld (for dormant cracks) or a flexible polyurea filler (for joints and cracks that still move seasonally).
- Level the fill, restore texture and topcoat over the repair.
Choosing rigid versus flexible filler is the judgment call in this branch, and it’s where a professional assessment earns its keep — welding a moving crack rigid just relocates the crack an inch to the side.
Branch 3: Peeling, Blisters and Delamination (Bond Failure)
The branch nobody wants. If the coating is releasing from the concrete — sheets lifting at tire positions, bubbles you can press down, edges flaking wider every month — patching over it is throwing good resin after bad, because the failure is at the bond line you can’t reach from above. The repair is subtractive first: every square inch of unbonded coating comes off, mechanically, and the exposed concrete gets diamond grinding to establish a true bonding profile before new material goes down. Just as important is fixing the reason it let go — usually missing surface prep by the original installer, or moisture vapor pushing up through the slab, which calls for a moisture-vapor-barrier epoxy basecoat in the rebuild. We’ve written a full diagnostic walkthrough in how to fix peeling epoxy flooring — the pattern of the peeling literally tells you why it failed.
This branch is professional territory, not because the steps are secret, but because it requires grinding equipment and a correct diagnosis. Recoating over a moisture problem fails twice as expensively the second time.
Branch 4: Worn but Sound (Not Damage — Age)
Dull traffic lanes, a constellation of fine scratches, gloss that’s gone satin where the cars roll — with no chips, no lifting, no cracks. Nothing here needs “repair.” This floor needs its sacrificial wear layer renewed: a screen-and-recoat, where the surface is abraded and a fresh topcoat — ideally a UV-stable polyaspartic — is applied over the sound system. It’s the scheduled pit stop that resets the clock on a garage floor coating for a fraction of the effort of any rebuild, and choosing it at the right time is exactly how floors reach the multi-decade lifespans described in how long epoxy flooring lasts.
Repair vs. Recoat vs. Rebuild: The Honest Thresholds
- Repair when damage is isolated, the surrounding bond is solid, and you can count the spots on one hand.
- Recoat when the system is bonded but the wear surface is tired — or when accumulated spot repairs have made the floor patchy.
- Rebuild when bond failure is spreading, moisture is implicated, or the original install skipped preparation. There is no patch for a floor that was never attached properly.
Frequently Asked Questions
Can I repair a chip in my epoxy garage floor myself?
Yes — chips with solidly bonded coating around them are the one repair genuinely suited to DIY. Scrape the edges clean, sand an inch past the crater, degrease, fill with a mixed two-part epoxy patch, blend flakes into the wet fill if you have a flake floor, and clear-coat the spot after cure. Expect “unnoticeable,” not “invisible.”
Why does the crack in my epoxy floor keep coming back?
Because the crack is in the concrete, not the coating, and the slab is still moving. Surface-filling the line treats the symptom. A lasting fix routs the crack open, fills it with rigid epoxy weld if it’s dormant or flexible polyurea if it still moves, then recoats over the repair — matching the filler to the movement is the whole trick.
Can peeling epoxy be glued back down?
No. Once the coating releases from the concrete, the bond surface underneath is contaminated, weak or moisture-affected — the very reason it failed — and no adhesive re-attaches it reliably. The unbonded area must be removed, the concrete diamond ground to a fresh bonding profile, the failure cause corrected, and new material installed.
How do I know if my floor needs repair or a full recoat?
Count and tap. A handful of isolated, well-bonded chips or one routed crack: repair. Widespread dullness and scratching with a sound bond: recoat the wear layer. Hollow-sounding zones, spreading peeling or recurring blisters: neither — that floor needs partial or full removal and a rebuilt system, because its bond, not its surface, has failed.
Top Epoxy Flooring repairs, recoats and rebuilds coated floors throughout Southern California using the VOC-free systems it manufactures — and backs its residential installations with a limited lifetime warranty. Call (818) 945-0915 for a free assessment and estimate.
Recent Comments